In classic SharePoint sites, it was possible to redirect users to a different site using a few different approaches. But modern SharePoint sites are more restrictive (for good) and offer different features that require different approaches.
Fortunately, if you need to redirect users when they try to access the homepage of a specific site, this can be easily achieved using a simple no-code solution.
Tag: SharePoint
Export PnP reusable controls from SPFx library component
SharePoint Framework allows you to create a library component (docs) type of project that you can use to bundle all your shared resources and add as a dependency to your other projects. Once deployed, the other projects will consume the shared resources from the library.
Continue reading “Export PnP reusable controls from SPFx library component”SPFx and modern SharePoint search page for searching the current location
Modern SharePoint sites on standard release will soon receive an update to add a search box to the top Office 365 bar. This allows you to search by default in the current location, like a site or a document library.

You can then configure the site to redirect user’s search queries to a custom search page and you can use the amazing PnP Modern Search web parts to create a great search experience
But what if you want to pass the context of the current location to the custom search page and keep searching only on that location by default?
SharePoint Framework application customizer
To pass the context of the current location to the custom SharePoint search page you can create an SPFx application customizer that you can add to the Top placeholder and use it to redirect the user to the search page, passing the context as a URL parameter.
An implementation example may look like this, adding a button below the search box , but you are free to decide how your component will look

Update your Application Customizer class to use the following function to identify the source Url
private _getSrcUrl = (): string => {
// set site url as default
let url: string = this.context.pageContext.web.absoluteUrl;
// if list or library and not Site Pages
if (this.context.pageContext.list
&& this.context.pageContext.list.serverRelativeUrl
&& this.context.pageContext.list.serverRelativeUrl.indexOf('SitePages') < 0) {
if (this.context.pageContext.web.serverRelativeUrl !== '/') {
// librarie's root folder
const listUrlPart = this.context.pageContext.list.serverRelativeUrl.replace(this.context.pageContext.web.serverRelativeUrl, '');
url += listUrlPart;
} else {
url += this.context.pageContext.list.serverRelativeUrl;
}
}
return url;
}
On the onClick event of the button, add the following code
const onClick = () => {
// this.props.srcUrl contains the value returned from the previous function that was passed to the React component as a property
let url = this.props.srcUrl && this.props.srcUrl !== '' ? this.props.srcUrl : window.location.href;
// get url parameters
const href: any = new URL(window.location.href);
// try to get relative path from id parameter - when exploring through views
let relativePath = href.searchParams.get("id");
if (!relativePath) {
// try to get relative path from RootFolder parameter - when accessing the folder via direct URL
relativePath = href.searchParams.get("RootFolder");
}
if (relativePath) {
// if inside a folder, build the url to include the full path to the folder
url = window.location.origin + encodeURIComponent(relativePath);
}
const w = window.open(`${customSearchPageUrl}?src=${url}`, '_blank').focus();
}
In summary, it generates a link to the search page and adds a src parameter with the current location. This needs to be done on the click event so that it always gets the correct location when exploring document library folders as the location is retrieved from the url on the document library (because of current issues related to this.context.application.navigatedEvent).
A sample url generated may look like this
https://contoso.sharepoint.com/sites/MySite/SitePages/Search.aspx?src=https://contoso.sharepoint.com%2Fsites%2FMySite%2FMyLibrary%2FMyFolder1%2FMyFolder2
Custom modern search page
I will not cover how to fully setup a custom search page using the PnP Modern Search web parts on this post. I will only cover how to use the location information available on the URL to limit the search scope.
To create search “zones”, we are going to use the Search Verticals web part. In the configuration, add two entries that use the same Result Source Identifier that contains all the results. Then on the “Current Location” vertical, set the query template to: {searchTerms} {?Path:”{QueryString.src}”}

The “Current Location” vertical will now only display results that have a Path value starting with the URL provided.
If you now test the solution (you can test just by adding different values to the src URL parameter) you will see that the results under “Current Location” are respecting the value provided.

The PnP Modern Search web parts are a great addition to your SharePoint sites. Not only they improve the search experience with the standard features, but they can only be configured to react to properties and configurations on your page.
Update metadata on SharePoint documents and folders
You have SharePoint managed metadata terms used in document libraries and you decide to update the label of a term. You can easily do so in the term store and wait for the change to take effect. All documents will display the new term label after the label change is propagated from the term store to the sites.
But what if you want to update a specific term, to a different term that already exists in the store? If you only have a small number of documents and folders that need to be updated, you can simply do the update manually. But if you need to update a large number of items, unfortunately this is a scenario that will require some automation.
The following script will to the job for you.
Summary
- PnP PowerShell for all the interactions with SharePoint
- Uses search to find all the documents/folders
- Checks the current value of the list item, in case search index is not updated
- Handle single or multi values
- Performs a system update: Modified and Modified by are not updated
- Generates a CSV file with the items parsed
The script currently connects to a specific site and assumes that all items retrieved from search belong to the site as this was the scenario tested. If you need to connect to multiple sites, you may need to adjust the script slightly to handle that.
Requirements
- PnP PowerShell available on the machine running the script
- A SharePoint search managed property mapped to the custom field associated with the term set (for example, RefinableString01)
Script to update metadata
$siteUrl = "https://contoso.sharepoint.com/sites/Home"
# ampersand: &
$oldTerm = "My old term label" -replace '&', '&'
$newTerm = "My new term label" -replace '&', '&'
$listColumn = "MyCustomField"
$termPath = "My Term Group|My Term Set|"
$Query = "* RefinableString01=""$oldTerm"""
$LogFile = "C:\users\$env:USERNAME\Desktop\UpdatedItems.csv"
# ---------------------------------
Connect-PnPOnline -Url $siteUrl -UseWebLogin
$SearchResults = Submit-PnPSearchQuery -Query $query -All -TrimDuplicates $false -SelectProperties ListItemID, ContentTypeId
# $SearchResults
$results = @()
foreach ($ResultRow in $SearchResults.ResultRows) {
$itemId = $ResultRow["ListItemID"]
$library = $ResultRow["ParentLink"].Split("/")[5] # quick way to get library from path
$contentTypeId = $ResultRow["ContentTypeId"]
$path = $ResultRow["Path"]
$parentLink = $ResultRow["ParentLink"]
$type = ""
Write-Host "Path: $path"
if ($contentTypeId -like '0x0101*') {
Write-Host "Document" -ForegroundColor Yellow
$type = 'Document'
}
if ($contentTypeId -like '0x0120*') {
Write-Host "Folder" -ForegroundColor Yellow
$type = 'Folder'
}
# Get list item
$listItem = Get-PnPListItem -List $library -Id $itemId -Fields $listColumn
if ($null -ne $listItem[$listColumn]) {
# Generate new value for the field
$termsWithPath = $null
if ($listItem[$listColumn].Count -gt 1) {
# check current value, in case search index is not updated
if ($listItem[$listColumn].Label -contains $oldTerm) {
# If multi-value, create an array of terms, and replace the old term by the new one
$termsWithPath = @()
foreach ($term in $listItem[$listColumn]) {
if ($term.Label -eq $oldTerm) {
$termsWithPath += $termPath + $newTerm
}
else {
$termsWithPath += $termPath + $term.Label
}
}
}
else {
Write-Host "Skipped: multi-value field does not contain term" -ForegroundColor Red
}
}
else {
# If single value, replace term
# check current value, in case search index is not updated
if ($listItem[$listColumn].Label -eq $oldTerm) {
$termsWithPath = $termPath + $newTerm
}
else {
Write-Host "Skipped: single-value field does not match term" -ForegroundColor Red
}
}
if ($null -ne $termsWithPath) {
# Update list item
$termsWithPath
Set-PnPListItem -List $library -Identity $itemId -SystemUpdate -Values @{"$listColumn" = $termsWithPath }
}
}
else {
Write-Host "Skipped: field is empty" -ForegroundColor Yellow
}
Write-Host "-------------" -ForegroundColor Yellow
#Creating object to export in .csv file
$results += [pscustomobject][ordered] @{
Library = $library
ItemId = $itemId
Type = $type
ParentLink = $parentLink
Path = $path
}
# break
}
$results | Export-Csv -Path $LogFile -NoTypeInformation
Trigger When a file is created or modified in SharePoint
Power Automate and Azure Logic Apps are great to use as automation tools for processes that include SharePoint data. A trigger that I often use is for when a file is created or modified in SharePoint. Unfortunately, they also seem to suffer from some limitations on large lists/libraries which can be quite hard to troubleshoot.
On this blog post, I describe the issue that I have recently experienced and how it can be quickly resolved.
Problem with flow – file created or modified
I encountered an issue on a client Office 365 tenant where flow triggers from a specific list were frequently breaking. The trigger used was When a file is created or modified (properties only) and seemed to only fail on that particular list. The list had around 450k documents at the time and multiple custom fields.
A support call was going on for about 3 weeks and during that period, the only workaround to keep functionality was to create a copy of the broken flow by using the “Save as” option. This would keep us running for a few days until the copy was also broken and we would create a new temporary copy – far from ideal, but kept things running.
Azure Logic Apps
Trying to find a solution to the issue or a reliable long term alternative, I went to re-create the flow as an Azure Logic App. Configured the logic app to run every minute and tried to test it by uploading some documents to the library.
Nothing happened.
I started troubleshooting and 1 hour later the instances were executed without any change being made. As I kept uploading documents for testing, the logic app kept running on significantly delayed schedules.
Solution
The solution turned out to be quite simple.
I tried to test different triggers and created a new logic app using the When a file is created (properties only) trigger. When testing it the first time, it failed, but game me the solution to the problem. The error message stated that the Created column was being indexed on the list and that the logic app would start working shortly. I went to the Indexed Columns and could see a label next to the Created column to show that it was being indexed.
In my case, the Modified field was already (automatically) indexed on the list, so after the index of the Created field completed, both logic apps started working as expected.
In summary, if you have large SharePoint lists and need to use automation triggers for when items are created or modified, double-check that the relevant list columns are indexed!
The link to Indexed Columns page for each list can be accessed under list Settings, at the bottom of the Columns section (just before the Views section).
Send items to second-stage SharePoint recycle bin
When a document or folder is deleted in SharePoint, it goes to the first-stage (site) recycle bin. After some time, it is moved to the second-stage recycle bin. And it stays there for another period before being completely deleted.
If you need to delete a very large number of documents in SharePoint, you may consider sending the items straight to the second-level recycle bin. This will prevent “flooding” the first-stage recycle bin with items, which would make the recycle bin hard to use for manually restoring deleted items.
This can be easily done with a few lines of PnP PowerShell.
First we need to delete the item and send it to the first-level recycle bin. We then query the recycle bin and retrieve the item with a DirName and Title that match the item previously deleted.
# Use Get-PnPListItem to retrieve the item(s) to delete
Remove-PnPListItem -List $DocLib -Identity $Item["ID"] -Recycle -Force
$path = $Item["FileRef"].substring(1) # remove first '/' from path as recycle bin items don't start with '/'
$path = $path.substring(0, $path.LastIndexOf('/')) # remove folder name and last '/'
$deletedItem = Get-PnPRecycleBinItem -FirstStage -RowLimit 1 | Where-Object { $_.DirName -Eq $path -and $_.Title -Eq $Item["FileLeafRef"]}
Move-PnpRecycleBinItem -Identity "$($deletedItem.Id)" -Force
Sample use case: Send all empty folders and files to second-stage recycle bin
The following script is an extension of the script that Veronique Lengelle published on her blog. The original script was to find empty folders and documents on a site. I have extended it to send all empty folders and files to the second-stage recycle bin. Finally, we move that item to the second-level recycle bin.
#Connect to SPO
Connect-PnPOnline -Url https://contoso.sharepoint.com/sites/Test -UseWebLogin
#Store in variable all the document libraries in the site
$DocLibrary = Get-PnPList | Where-Object { $_.BaseTemplate -eq 101 }
$LogFile = "C:\users\$env:USERNAME\Desktop\SPOEmptyFoldersAndDocuments.csv"
$results = @()
foreach ($DocLib in $DocLibrary) {
#Get list of all folders and documents in the document library
$AllItems = Get-PnPListItem -PageSize 1000 -List $DocLib -Fields "SMTotalFileStreamSize", "Author", "ID"
#Loop through each files/folders in the document library for folder size = 0
foreach ($Item in $AllItems) {
if ((([uint64]$Item["SMTotalFileStreamSize"]) -eq 0)) {
Write-Host "Empty folder/file:" $Item["FileLeafRef"] -ForegroundColor Yellow
#Creating object to export in .csv file
$results += [pscustomobject][ordered] @{
CreatedDate = [DateTime]$Item["Created_x0020_Date"]
FileName = $Item["FileLeafRef"]
CreatedBy = $Item.FieldValues.Author.LookupValue
FilePath = $Item["FileRef"]
SizeInMB = ($Item["SMTotalFileStreamSize"] / 1MB).ToString("N")
LastModifiedBy = $Item.FieldValues.Editor.LookupValue
EditorEmail = $Item.FieldValues.Editor.Email
LastModifiedDate = [DateTime]$Item["Modified"]
}
#Remove item - send to first-level recycle bin
Remove-PnPListItem -List $DocLib -Identity $Item["ID"] -Recycle -Force
#Generate relative path in the same format as used by the recycle bin. Example: sites/Test/Shared Documents
$path = $Item["FileRef"].substring(1) # remove first '/' from path as recycle bin items don't start with '/'
$path = $path.substring(0, $path.LastIndexOf('/')) # remove folder name and last '/'
#Get previously deleted item from first stage recycle bin using path and title
$deletedItem = Get-PnPRecycleBinItem -FirstStage -RowLimit 1 | Where-Object { $_.DirName -Eq $path -and $_.Title -Eq $Item["FileLeafRef"]}
#Move item to second-stage recycle bin
Move-PnpRecycleBinItem -Identity "$($deletedItem.Id)" -Force
Invoke-PnPQuery
}#end of IF statement
}
}
$results | Export-Csv -Path $LogFile -NoTypeInformation
Reset API access in SharePoint online for SPFx solutions
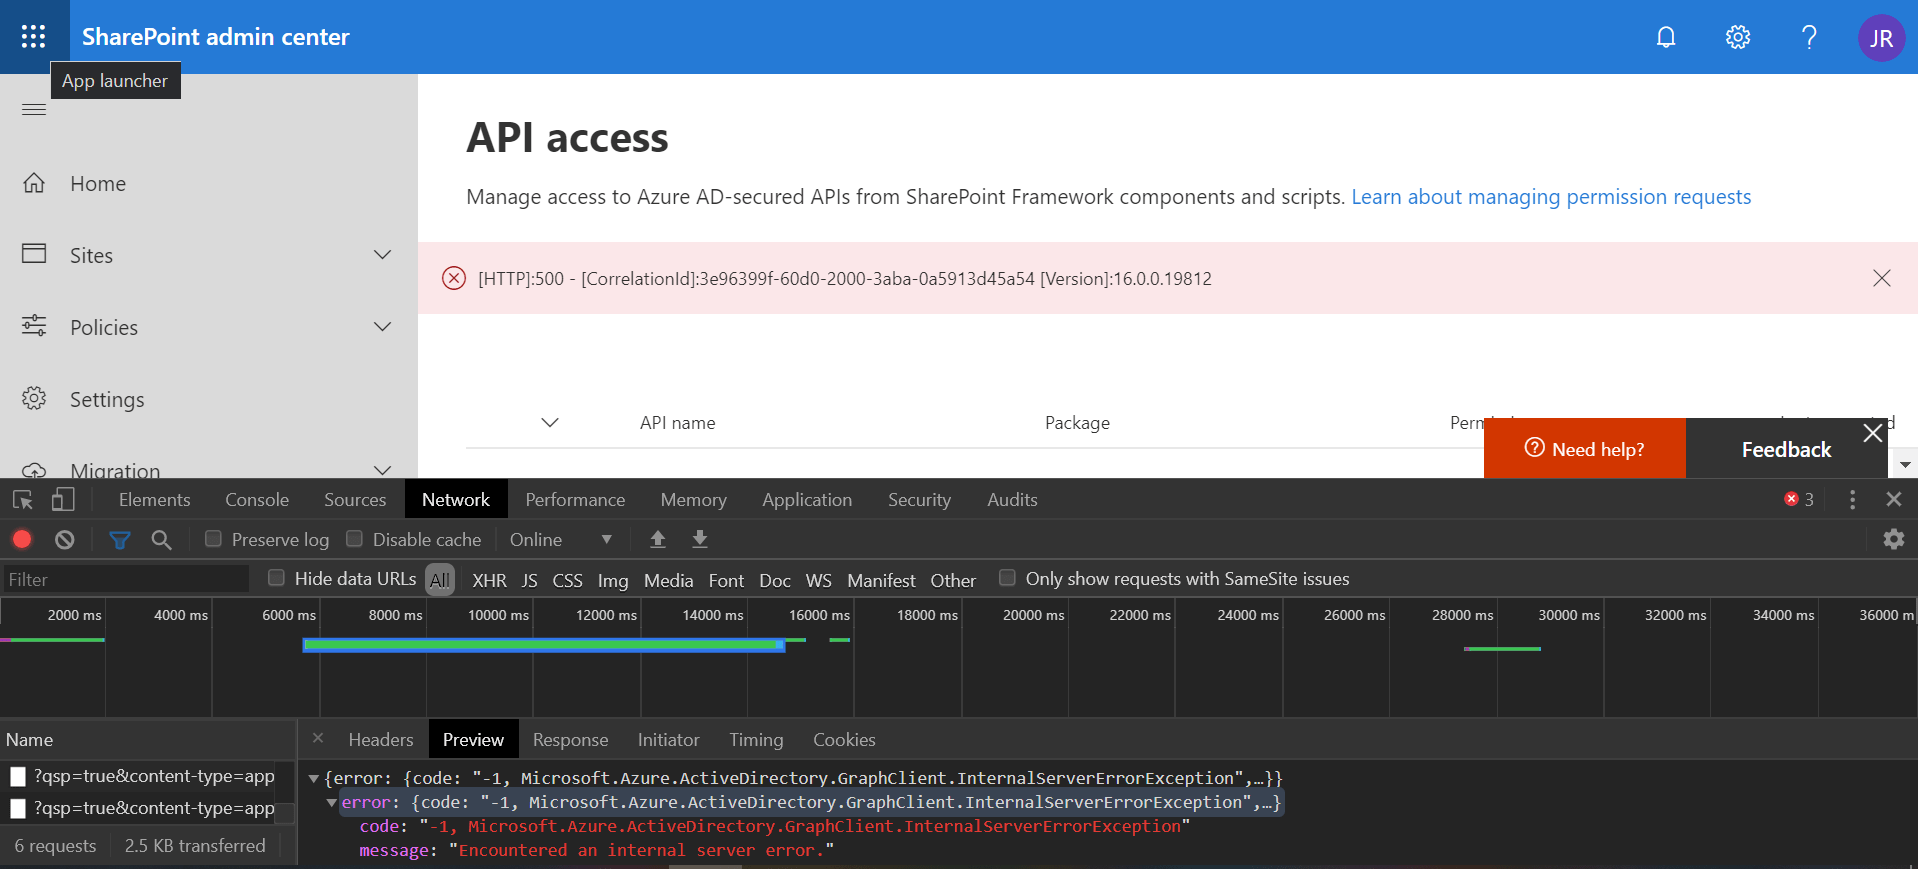
If you try to approve API access requests in SharePoint online and get a generic error like the one below, just remember the first rule of IT: “turn it off and on again”
Continue reading “Reset API access in SharePoint online for SPFx solutions”Convert PnP TaxonomyPicker selection to update value
I am a big fan of the PnP reusable controls and previously delivered some sessions about them. You can find the slides for one session on this blog post. One of my favorite controls is the TaxonomyPicker control, which I often use in custom forms to update list columns.
When using the PnP TaxonomyPicker reusable control to let the user select values for a managed metadata list field in SharePoint, you have to convert that selection into an object that you can then pass to the REST api when updating the field value.
Continue reading “Convert PnP TaxonomyPicker selection to update value”SharePoint SPFx extension – Advanced copy and move
A client recently asked me to create an advanced version of the default “Copy to” and “Move to” SharePoint capabilities available on every document library. This blog post will cover the main decisions, challenges and tools that I used to achieve this.
After out client went live with a new SharePoint site to be used as the main “landing page” for the company, they started receiving some feedback from end users. I created some custom SPFx web parts and extensions for the site, so was expecting some feedback on my work. Instead, the most common feature that users were providing feedback on was the out-of-the-box “Copy to” and “Move to”.
I explained to the client that it would not be possible to customise or disable out-of-the-box features, so they decided to create alternative versions: “Advanced copy” and “Advanced move”

Limitations of default features
The following points were the most significant limitations behind the decision to create the new feature:
- Slow performance when displaying large number of folders
- No option to filter/search a large list of folders
- No target location set by default
- Limited space to display folder names
Requirements
Based on the user feedback and limitations identified during testing, we defined the following key requirements:
- Look and feel should not be very different from out-of-the-box features
- It should provide better performance, mainly when loading and displaying a large number of folders
- Provide an option to filter a list of folders by name
- It should use the current folder as the default location. Users were often copying/moving documents to folders related to the current location
- Before completing the operation, the user should be able to specify new names for the documents or folders
Implementation
While I’m working on getting permission from my client to publish the solution to the open source PnP community repositories, so that others facing similar challenges can benefit from it, I decided to publish this information that may help others on a similar journey.
I implemented the solution as a custom SPFx list view command set with two options that share the same code base. Depending on the option selected, the relevant action (copy/move) label is displayed on the screen. The appropriate service function is then called, but other than that, all the other code is shared.
SharePoint API calls
I have used PnPjs for all the SharePoint REST API calls.
Copy document, move document, copy folder and move folder options use new capabilities that I added to PnPjs for this purpose. You can read more about it on a separate blog post that I published recently.
Performance was never an issue. And often, large collections of folders are loaded multiple times faster than the out-of-the-box counterparts.
// get list of libraries within a site:
await sp.site.getDocumentLibraries(webAbsoluteUrl)
// get list of folders within a folder/library
await web.getFolderByServerRelativeUrl(folderRelativeUrl).folders.select('Name', 'ServerRelativeUrl').orderBy('Name').get()
// add new folder
await web.getFolderByServerRelativeUrl(folderRelativeUrl).folders.add(name)
// copy file
await sp.web.getFileByServerRelativePath(srcPath).copyByPath(`${destPath}/${name}`, shouldOverWrite, KeepBoth);
// move file
await sp.web.getFileByServerRelativePath(srcPath).moveByPath(`${destPath}/${name}`, shouldOverWrite, KeepBoth);
// copy folder
await sp.web.getFolderByServerRelativePath(srcPath).copyByPath(`${destPath}/${name}`, keepBoth);
// move folder
await sp.web.getFolderByServerRelativePath(srcPath).moveByPath(`${destPath}/${name}`, keepBoth);
Main User Interface components
Breadcrumb
A breadcrumb component is available at the top of the panel to allow the user to navigate to a previous folder within the hierarchy level. It displays a node for each section of the path to the folder currently selected and an option to select a different “place” – sites or OneDrive (in the future).

The breadcrumb is based on the Breadcrumb control from Office UI Fabric.
<Breadcrumb items={breadCrumbItems} className={styles.breadcrumbPath} maxDisplayedItems={3} overflowIndex={overflowIndex} />
And the function to generate the array of breadcrumb items. Each item has an onClick callback function to get the list of sub-folders for that path.
/**
* Get breadcrumb items
* @returns an array of IBreadcrumbItem objects
*/
private _getCurrentBreadcrumbItems = (): IBreadcrumbItem[] => {
let items: IBreadcrumbItem[] = [];
let rootItem: IBreadcrumbItem = { text: 'Places', key: 'Places', onClick: this._showPlacePicker, };
items.push(rootItem);
let siteItem: IBreadcrumbItem = { text: this.state.selectedSite.Title, key: 'Site', onClick: this._getSiteLibraries.bind(this, this.state.selectedSite) };
items.push(siteItem);
if (this.state.selectedLibrary != null) {
let libraryItem: IBreadcrumbItem = { text: this.state.selectedLibrary.Title, key: 'Library', onClick: this._getRootFolders.bind(this, this.state.selectedLibrary) };
items.push(libraryItem);
}
if (this.state.selectedFolder) {
const folderPathSplit = this.state.selectedFolder.ServerRelativeUrl.replace(this.state.selectedLibrary.ServerRelativeUrl + '/', '').split('/');
let folderPath = this.state.selectedLibrary.ServerRelativeUrl;
folderPathSplit.forEach((folderName, index) => {
folderPath += '/' + folderName;
let folderItem: IBreadcrumbItem = { text: folderName, key: `Folder-${index.toString()}`, onClick: this._getSubFolders.bind(this, { Name: folderName, ServerRelativeUrl: folderPath }) };
items.push(folderItem);
});
}
items[items.length - 1].isCurrentItem = true;
return items;
}
Folders list
This is the core component. It lists the sub-folders currently available under the current path (either a library or a folder) and allows the user to click on one of the sub-folders to move one level deep into the hierarchy.

A simple filter is available at the top of the list to filter the data array based on user input.

At the bottom, a custom control lets the user create a new folder if he wishes to do so (similar to the OOB feature)

Progress panel
Once the user selects a target folder using the “Copy here” button, the interface replaces the list of folders by a progress panel.


An array stores each file/folder selected by the user. Each object of the array has a “status” property that controls the displayed status for each item on the screen.
For example, if the data service reports that the file already exists on the target folder, the corresponding array item is updated accordingly. A friendly message is then displayed to the user, next to that item, with buttons to replace or keep both files.
Limitations
It’s not possible (at the least at the moment?) to disable the out-of-the-box “Copy to” and “Move to” capabilities. This leads to “duplicated functionality” for end users that need to be trained on what feature to use. It would be great if it was possible for administrators of a site to disable specific default features.
Copy & move SharePoint documents/folders using PnPjs
The latest release of PnPjs contains 4 new methods. They allow you to copy and move, files and folders, to a different folder on the same or a different site collection. And they are incredibly fast!
Motivation
I have been recently asked by a client to develop a feature replacement to the default SharePoint copy and move to features. The OOB versions had some limitations that were causing problems to end users. With this in mind, I started by creating a proof-of-concept solution (SPFx list view command set extension). But soon realized that the functionality to copy and move files/folders between sites was not available in PnPjs. And so I added it and submitted a pull request (my first ever for the main PnPjs repository)!
Update: I wrote a blog post providing more details about the copy and move extension. You can read more here.
New copy and move features
- Copy and move documents and folders to the same site. PnPjs already had methods to do this, but using a different API endpoint
- Copy and move documents and folders to a different site
- If a file with the same name already exists, you can decide to replace or keep both. When keeping both files, a numeric value will by added to the name of the new file
- If a folder with the same name already exists when moving, you can decide to keep both. When keeping both folders, a numeric value will by added to the name of the new folder. The replace option is not available for folders
- Copying will not persist the version history of the source file
- Moving will persist the version history of the source file
Usage
As part of the pull request to add the new capabilities I have also updated the documentation (and tests) so people can easily understand how to use them. In short, your code will look similar to this (or use promises if you prefer):
Copy file by path
await sp.web.getFileByServerRelativePath(srcPath).copyByPath(`${destPath}/${name}`, shouldOverWrite, KeepBoth);
Move file by path
await sp.web.getFileByServerRelativePath(srcPath).moveByPath(`${destPath}/${name}`, shouldOverWrite, KeepBoth);
Copy folder by path
await sp.web.getFolderByServerRelativePath(srcPath).copyByPath(`${destPath}/${name}`, keepBoth);
Move folder by path
await sp.web.getFolderByServerRelativePath(srcPath).moveByPath(`${destPath}/${name}`, keepBoth);
Extra: Contributing to PnPjs
I use PnPjs for a very long time as it immensely helps me on my daily job, so I’m very happy that I was able to add a little bit more to it.
The project is so big that the first feeling I had was that adding the code there would take me longer than doing it on my own solution – but it clearly was the right thing to do. But guess what? The code is so well structured that this is actually pretty simple! All I had to do was to find the file where my functions should go (just follow the logical structure of folders that mirror the different packages) and find a similar function that I used as a starting point. Update the reference to the target REST API endpoint, update the data passed in the body (for POST requests) and all was done! All that was left to do after that was to update the documentation and tests, where I followed a similar approach.
We can all use it on any project going forward without having to worry about it! Sharing is caring 🙂