Did you ever wanted to quickly delete all items from a SharePoint list without having to run into complex scenarios? This can be simply achieved using PnP Powershell (obviously!). And it fits in a single line!
If you are looking for options to delete documents from SharePoint document libraries, maybe this post can help.
Similar to my last post Get list of frequent sites in SharePoint , this time I’m using the same approach to query a different API and get the recent documents for the current user.
SharePoint offers an OOB web part that you can use to list the recent documents for the current user. But what if you need the exact same information for a custom SharePoint Framework solution?
WARNING
Unfortunately, it seems that this is not currently possible using the SharePoint REST API or MS Graph. The API used on the sample code below is currently not documented and you should understand the risks when using it!
Hopefully Microsoft will make this information available soon via MS Graph or document this API.
Recent documents
[4th Nov 2019 – Update – Added new required HTTP headers when requesting data from the service: X-Office-Platform, X-Office-Application, X-Office-Version]
SharePoint offers an OOB web part that you can use to list the frequent sites for the current user. But what if you need the exact same information for a custom SharePoint Framework solution?
I have also wrote a similar blog post on how to retrieve recent documents for current user. You can read more here.
WARNING
Unfortunately, it seems that this is not currently possible using the SharePoint REST API or MS Graph. The API used on the sample code below is currently not documented and you should understand the risks when using it!
When creating SPFx solutions, you will sometimes require base64-encoded images. A common scenario is when you create a ListView Command Set extension . And then you look at Office UI Fabric Icons and think how nice it would be if you could easily get the images as base64-encoded strings to use on SPFx solutions.
In this example, I created an icon for a SPFx ListView Command Set that uses 16×16 px icons from Fabric React.
As you can see from the image, all you have to do is copy the Data URL field and paste that value on the manifest.json file of your solution.
The icon will look great on the page (search folders):
Unfortunately the tool seems to have a limitation and it doesn’t give you the option to have transparent background, so be aware when selecting a background colour. Update: I am glad to confirm that I was wrong and the tool does in fact support transparent backgrounds! Just use ‘transparent’ as the value for the background colour as per the image above.
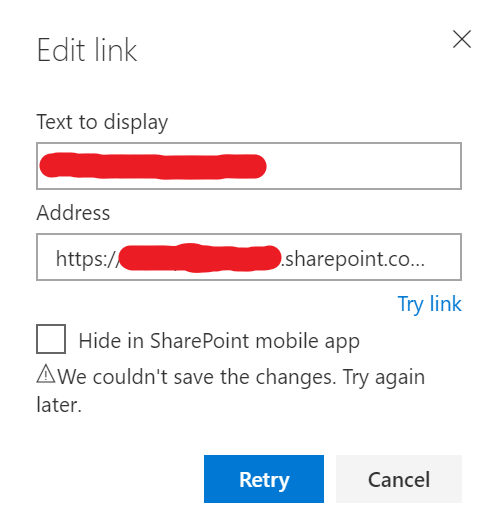
And guess what? Trying again later didn’t really work… But don’t worry, this is SharePoint and a lot of things are stored in lists. An hidden list, in this case.
To access the hidden list and easily update the featured links, just navigate to the following Url https://XXXXXXXXX.sharepoint.com/Lists/SharePointHomeOrgLinks/AllItems.aspx
But your changes probably won’t be immediately reflected on the home page as the links are cached. To force them to refresh, open the dev tools on the browser and clear the site data. The following image shows where this option can be found on Chrome.
Sorry, no dev related topic this time, but you may find it useful at some point.
The Microsoft Graph endpoints for Teams are not something new. You can easily find online multiple blog posts containing sample requests on how to retrieve the teams that a user is a member of. Instead, in this blog post, I will share some code blocks that I used to accomplish this on a SharePoint Framework project.
A sample SharePoint Framework web part solution (react-my-teams) can be found on the PnP Web Part Samples repository once the pull request is merged. Feel free to use the solution as a starting point and implement the user interface to your needs. And you are also welcome to submit updates to it 🙂
Setting required API permissions
The SharePoint Framework project will use the MSGraphClient to retrieve data from Microsoft Graph. In order to be allowed to get the data we need, we will need to request the following permissions (declared on package-solution.json):
Alternatively, you can use the Office 365 CLI to grant the required permissions. This blog post will give you all the info you need.
Get Tenant information
In order to open Teams channel links on the client application, you need to include the tenant Id as one of the URL parameters. You can get the Tenant Id using the code below
Next, you will need to retrieve the channels for a given team. This will allow us to get the information of the default channel (General) that we will use on the links.
To improve performance on page load, we only load the list of teams by default. The channels information is only loaded when the user clicks on the link, which is then used to generate the final link that will take the user to Teams.
The link will look something like this:
<a href="#" title='Click to open channel' onClick={this._openChannel.bind(this, team.id, this.props.tenantId)}>
<span>{team.displayName}</span>
</a>
And the following code will generate the required Teams link and open the selected team on Teams (browser or client App)
private _openChannel = async (teamId: string, tenantId: string): Promise<void> => {
let link = '#';
const teamChannels: IChannel[] = await this._getTeamChannels(teamId);
const channel = teamChannels[0];
if (this.props.openInClientApp) {
link = `https://teams.microsoft.com/l/channel/${channel.id}/${channel.displayName}?groupId=${teamId}&tenantId=${tenantId}`;
} else {
link = `https://teams.microsoft.com/_#/conversations/${channel.displayName}?threadId=${channel.id}&ctx=channel`;
}
window.open(link, '_blank');
}
A user syncs a SharePoint document library using OneDrive, so that he can have a local copy of the documents.
When he doesn’t need them anymore, he deletes the documents from the machine (which is a sensible approach).
OneDrive syncs the changes and deletes the documents in the SharePoint library.
User notices that the documents were deleted, opens the recycle bin and restores them.
One Drive syncs all the documents back to the SharePoint library and all is good again. NOT!
Even though all your documents are back into the SharePoint document library, they do not contain information about previous versions. This information is recorded against the original list item object. The original documents, containing the version history information are now in the site recycle bin. But, because OneDrive uploaded a new copy of the documents, you are unable to restore the deleted versions. This is because the library already contains a document with the same name. This is simple to manually resolve if you only have a few documents affected. But what if we are talking about hundreds or thousands? And multiple libraries? Well, in this case, PnP PowerShell to the rescue!
Warning: the following instructions do not take into consideration documents that have been modified since the initial restore from OneDrive. You will have to plan for that – list views are a very useful tool to check documents modified recently.
1 – Rename documents restored by OneDrive
Let’s start by renaming the existing documents, that were restored by OneDrive when the user restored the local deleted folder.
The following script renames all the items on the document library by adding “old_delete_” to the current document name. This is just a “unique” sample reference that we are adding to be able to delete the correct documents later.
After we rename the documents in the document library, we can restore the ones from the SharePoint site recycle bin.
The following script queries the recycle bin for all the items that march a specific condition: DirName contains a specific string. This condition allows us to select deleted documents that belong to a specific document library. For example, documents/test for a test folder within Documents library. But you can also add more conditions if required. All the items that match the criteria will then be restored.
Now that all the original items were restored, we can delete the ones that were restored by OneDrive. These are the ones that do not contain the version history.
The following script queries the document library for all the documents that contain our custom string on the name. “old_delete_” in this example. And finally moves them to the recycle bin.
The PnP TaxonomyPicker reusable control doesn’t have a property to let you mark the input control as a required field on a form, but fortunately, this can be easily addressed.
If you have used the PnP TaxonomyPicker reusable control before, you may have noticed that it doesn’t have a property to make it required, nor does it have a property that lets you add a custom CSS class to it. The problem is that your other required input controls on the form will have a ‘*’ after the label, but not the TaxonomyPicker controls.
But there is a very simple way to solve this, because the control also has a Label control, so we can mimic the styles from other Office UI Fabric input controls.
Simply create a new CSS rule that includes a class and targets a label as a child item
I’ve recently worked on a client project where I used the Visio JavaScript APIs in a custom SharePoint web part. The web part was used to embed Visio files on a SharePoint page, and access custom properties from the file. The property values are then used to generate a custom and dynamic user interface.
Make no mistake, I’m not a Visio expert. Another member of the team (a Visio MVP!) generated and customized the Visio files as required. I was amazed with some of the things that Visio can do that I was not aware of before the project started.
Unfortunately, due to client constraints, we had to create the solution as a classic script editor web part. But I was determined to create a sample SharePoint framework web part with some of my findings.
You can get the code from my GitHub repository here.
I created a pull request to the SharePoint PnP sample web parts repository, so will update this paragraph later.
Before you can start development, you will need some additional configuration.
We are going to use the JavaScript dependencies for Visio from the original CDN on the API documentation, so we will need two things:
Load external script
Install type definitions
Load external script
Start by adding a new entry to the “externals” section of you config.json file to load the visio-web-embedded.js file from the appsforoffice.microsoft.com CDN. In this case you will have to also add a “globalName” property to it.
To ensure that you use the required format for external scripts, you can use the awesome SPFx Script Check tool from Rencore.
Next, open your web part TS file and add the following import to load the module previously declared: import ‘officejs’.
Install type definitions
Now that the script reference is complete, we need to add the type definition files for Office: @types/office-js. You can install them from npm as a dev dependency
npm install --save-dev @types/office-js
But configuration is not yet complete as an additional step is required. After you install the type definitions, if you try to use a type or class from the imported ‘officejs’ module, it will still not be recognized. In order to resolve this, you need to update tsconfig.json to include the specific office-js type.
My sample web part has a VisioService.ts file with some sample code and some basic operations (some of them based on documentation samples converted to TypeScript) that you can reuse. Give it a try and any feedback is welcome.
SharePoint Framework is suddenly not an option and you feel sad because you need to go back to write plain JavaScript? You don’t have to and you really shouldn’t. Spend just a few minutes and you can use Typescript with SharePoint Script editor web parts instead!
Let me be super clear about this: you should always use SharePoint Framework whenever possible! This blog post is about an extremely simple alternative when SPFx is simply not an option. And by extremely simple, I really mean it. It doesn’t even include webpack (or similar tools), which would give a ton of other benefits. So before you use this configuration, ensure that it covers your requirements (note: you won’t be able to use TypeScript ‘imports’!).
Requirements
Before we dive into the details, let me start by sharing the high level requirements that led to this.
2 Weeks ago, I was asked to create a web part to a client. That is a super common requirement…but this time I was not allowed to use SPFx. First thing that came to my mind was: “No way! I will decide what tools to use!” Then I was told that the client did not had a SharePoint app catalog and creating one was not an option at all due to internal policies. After this, the developer inside me started crying, thinking about the possibility of having to create a web part in JavaScript.
Clearly that would never happen, so I had to find a super simple way to use TypeScript with SharePoint! It had to be something simple as it could not impact progress and time-frames already agreed with the client.
List of tech requirements:
Needs to work with a SharePoint classic content/script editor web part
Needs to be deployed to a SharePoint document library
Can make use of libraries hosted from a CDN, but only some (in this specific case, Visio JavaScript API was required)
Needs to retrieve data from 2 lists in SharePoint via REST API
Needs to display some information to the user on a not very complex UI
As you can see, the list of requirements was relatively simple. So is the solution.
Solution
npm
Start by creating a new folder for your project. Open a command line terminal on that folder and run
npm init
This will lead you through some questions that will be used to generate a new “package.json” file for your project.
TypeScript
Next, we will install TypeScript as a development dependency. Go back to the command line and run
npm install typescript --save-dev
After TypeScript is installed, open the “package.json” file and add two new entries as per the image below. We are going to use tsc to compile the TypeScript code
watch – this will be used during development to automatically build the project (transpile TypeScript into JavaScript) every time the TypeScript file is saved (on changes)
build – this task allows building on demand
To run the tasks on the command line, execute “npm run <task-name>”
Next, create a tsconfig.json configuration file for TypeScript (again, we are keeping things very simple here, but feel free to explore further options):
Note that sourceMap is set to true in order to generate source map files. Also, a destination folder is not configured, so JavaScript files generated as build output will be placed on the same folder as the TypeScript files.
The include property has a reference to a src folder, so create one at the root. This is where your files will be placed.
Types
Go ahead and install the required typings. In my case, I was using jQuery, so
install @types/jquery --save
And that’s it in the configuration side. Extremely simple as promised.
Web Part files
In the source folder, create a CSS, HTML and TypeScript folder with the name of your SharePoint web part (for consistency)
The HTML file will be the entry point for your web part from the content editor web part. Add references to CSS and JavaScript files, and then start your application. All the references to local files are relative to the pages Library, and in this case are located on the Site Assets library, in a HelloWorld folder.
Note the reference to polyfill.io as this is required in order to use promises on certain browsers…
At the bottom, we simply create an instance of our main class and execute the main method to load everything.
And finally, an extremely simple example of the HelloWorld class that only logs a message to the console
Content Editor Web Part
Now to use the web part on a page, the only thing that you need to do is add the url of the HTML file to a content editor web part and everything will load as expected.
Final thoughts
As you can see, it’s extremely simple to avoid having to write JavaScript again. Why would you want to do it when you can write TypeScript for SharePoint instead?
As mentioned in the beginning, this was an extremely simple setup only based on TypeScript and I believe it can be very useful for simple scenarios or for someone not familiar with other tools that allow for more advanced scenarios. If your requirements are slightly more complex, you will likely require a more complex build process.
If you have not tried TypeScript yet and are “stuck” with developing web parts to be embedded on a page using the classic approach, then hopefully this blog post will incentive you to give it a try.