
SharePoint Framework is suddenly not an option and you feel sad because you need to go back to writing plain JavaScript? You don’t have to and you really shouldn’t. Spend just a few minutes and you can use Typescript with SharePoint Script editor web parts instead!
Let me be super clear about this: you should always use SharePoint Framework whenever possible! This blog post is about an extremely simple alternative when SPFx is simply not an option. And by extremely simple, I really mean it. It doesn’t even include webpack (or similar tools), which would give a ton of other benefits. So before you use this configuration, ensure that it covers your requirements (note: you won’t be able to use TypeScript ‘imports’!).
Requirements
Before we dive into the details, let me start by sharing the high-level requirements that led to this.
2 Weeks ago, I was asked to create a web part for a client. That is a super common requirement…but this time I was not allowed to use SPFx. The first thing that came to my mind was: “No way! I will decide what tools to use!” Then I was told that the client did not have a SharePoint app catalog and creating one was not an option at all due to internal policies. After this, the developer inside me started crying, thinking about the possibility of having to create a web part in JavaScript.
Clearly, that would never happen, so I had to find a super simple way to use TypeScript with SharePoint! It had to be something simple as it could not impact progress and time-frames already agreed upon with the client.
List of tech requirements:
- Needs to work with a SharePoint classic content/script editor web part
- Needs to be deployed to a SharePoint document library
- Can make use of libraries hosted from a CDN, but only some (in this specific case, Visio JavaScript API was required)
- Needs to retrieve data from 2 lists in SharePoint via REST API
- Needs to display some information to the user on a not-very-complex UI
As you can see, the list of requirements was relatively simple. So is the solution.
Solution
npm
Start by creating a new folder for your project. Open a command line terminal on that folder and run
npm init
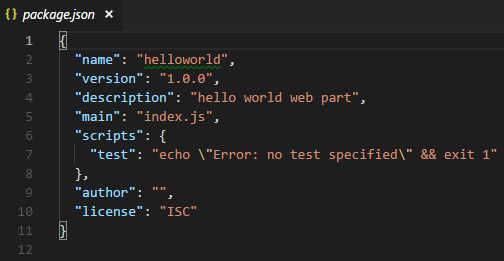
This will lead you through some questions that will be used to generate a new “package.json” file for your project.
TypeScript
Next, we will install TypeScript as a development dependency. Go back to the command line and run
npm install typescript --save-dev
After TypeScript is installed, open the “package.json” file and add two new entries as per the image below. We are going to use tsc to compile the TypeScript code
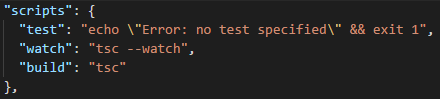
- watch – this will be used during development to automatically build the project (transpile TypeScript into JavaScript) every time the TypeScript file is saved (on changes)
- build – this task allows building on demand
To run the tasks on the command line, execute “npm run <task-name>”
Next, create a tsconfig.json configuration file for TypeScript (again, we are keeping things very simple here, but feel free to explore further options):
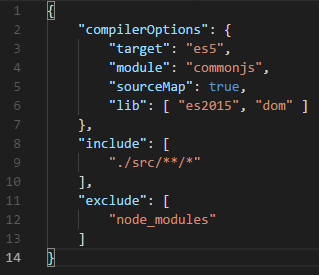
Note that sourceMap is set to true in order to generate source map files. Also, a destination folder is not configured, so JavaScript files generated as build output will be placed on the same folder as the TypeScript files.
The include property has a reference to a src folder, so create one at the root. This is where your files will be placed.
Types
Go ahead and install the required typings. In my case, I was using jQuery, so
install @types/jquery --save
And that’s it on the configuration side. Extremely simple as promised.
Web Part files
In the source folder, create a CSS, HTML, and TypeScript folder with the name of your SharePoint web part (for consistency)
The HTML file will be the entry point for your web part from the content editor web part. Add references to CSS and JavaScript files, and then start your application. All the references to local files are relative to the pages Library, and in this case are located on the Site Assets library, in a HelloWorld folder.
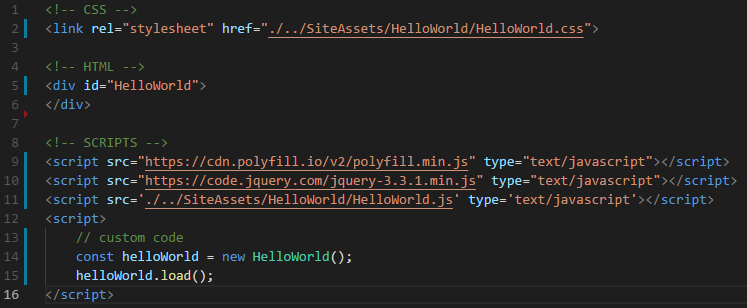
Note the reference to polyfill.io as this is required in order to use promises on certain browsers…
At the bottom, we simply create an instance of our main class and execute the main method to load everything.
And finally, an extremely simple example of the HelloWorld class that only logs a message to the console

Content Editor Web Part
Now to use the web part on a page, the only thing that you need to do is add the url of the HTML file to a content editor web part and everything will load as expected.
Final thoughts
As you can see, it’s extremely simple to avoid having to write JavaScript again. Why would you want to do it when you can write TypeScript for SharePoint instead?
As mentioned in the beginning, this was an extremely simple setup only based on TypeScript and I believe it can be very useful for simple scenarios or for someone not familiar with other tools that allow for more advanced scenarios. If your requirements are slightly more complex, you will likely require a more complex build process.
If you have not tried TypeScript yet and are “stuck” with developing web parts to be embedded on a page using the classic approach, then hopefully this blog post will incentive you to give it a try.